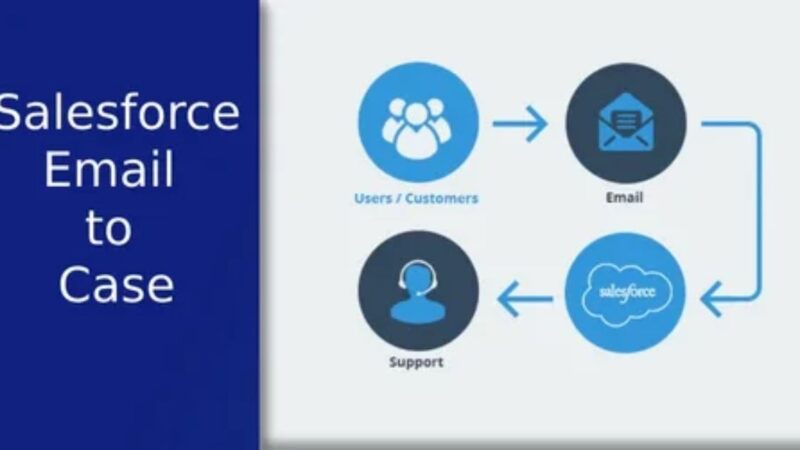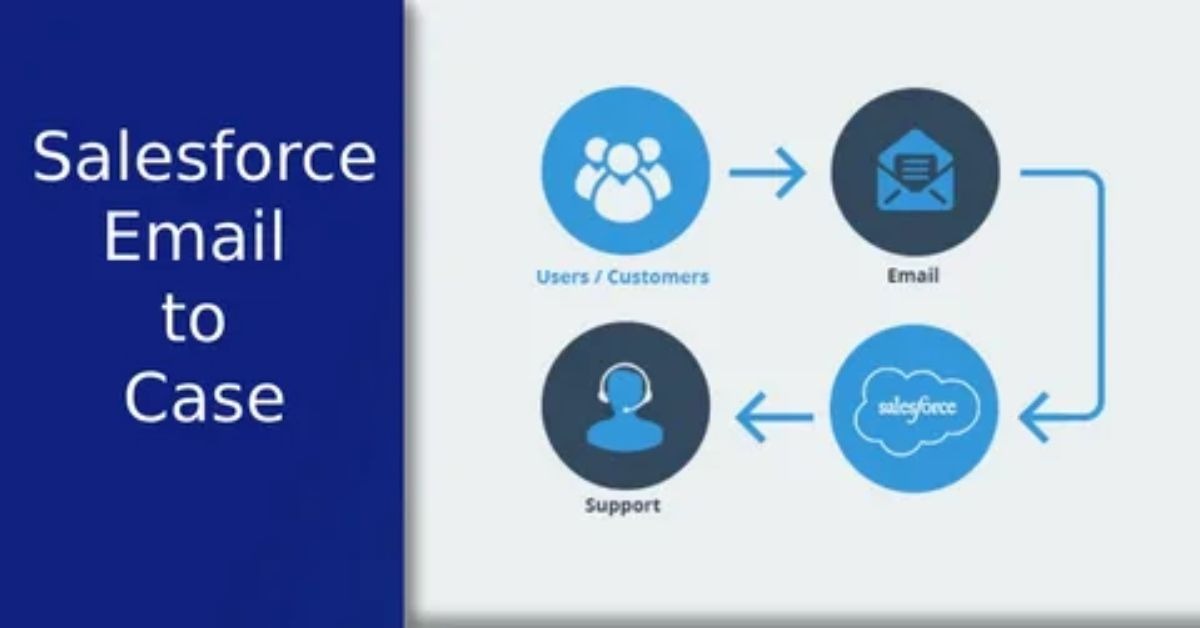
Email to Case Salesforce is a handy application that converts emails received by customers into trackable cases on your CRM. It takes the incoming messages in a dedicated address and automatically creates cases with all the important details such as sender information and attachments. You can pick between standard Email to Case for manual inboxes or On-Demand for cloud-based power handling bigger volumes. This setup keeps your support team organised and ready to tackle queries fast.
Picture your inbox overflowing with customer emails piling up faster than you can brew a cuppa. Without automation you are stuck copying and pasting details into Salesforce, losing hours and risking mistakes. Email to Case Salesforce swoops in like a trusty partner saving you from that chaos. It is the secret sauce for support teams who want to cut response times and keep customers smiling.
In this guide we will walk you through setting up Email to Case Salesforce step by step with practical tips to dodge common hiccups. You will learn how to configure routing addresses, automate replies and track success with real metrics. By the end you will have a streamlined system that boosts team productivity by up to 40%. Ready to transform your support game? Let’s dive in.
What is Email to Case Salesforce?
Email to Case Salesforce is a clever feature that turns your customer emails into trackable cases right inside your CRM. It grabs messages sent to a special email address and automatically creates cases, pulling in details like the sender’s name and attachments. You can choose standard Email to Case for smaller setups or On-Demand for handling bigger email volumes with cloud power.
This tool is all about making life easier for busy support teams who need to stay on top of customer queries. It links emails to existing contacts or accounts so you are not scrambling to match things up. With auto-threading, replies stay organised and you can even set up quick responses to keep customers happy. It’s like having an extra pair of hands that never sleeps.
Best Practices to Maximise Your Investment
Email to Case Salesforce is a game-changer but you need smart habits to make it shine. Set up clear assignment rules to route cases to the right team fast. Use automated replies with a personal touch to keep customers happy while saving time. Track metrics like resolution speed to spot gaps and keep improving.
Consider your set-up to be a well-oiled machine that requires tuning on a regular basis. Pair it with queues to handle high email volumes without missing a beat. Add integrations like Slack for quick team alerts or AI tools for clever case sorting. These adjustments make good and increase the performance of your team up to 40 times.
Assignment and Routing Magic
Get your cases to the right people without delay using smart assignment rules. Map emails to specific queues based on keywords or sender details. This cuts confusion and speeds up responses keeping your team on track. It’s like giving your inbox a GPS for perfect delivery every time.
Auto-Replies
A quick friendly auto-reply can make customers feel heard while you sort their case. Include the Case Thread ID in hidden white text to keep replies linked. Personalise templates with their name or issue type for that extra touch. It is a small step that builds trust fast.
Security and Compliance
Protect sensitive customer data by masking fields like credit card numbers. Set up filters to archive spam or non-customer emails. This keeps your CRM clean and meets data protection rules. Think of it as a digital bouncer for your support system.
Integrate for Superpowers
Supercharge your setup by linking Email to Case with tools like Slack for real-time alerts. Add AI like Einstein to auto-sort cases by urgency or topic. These integrations save time and let your team focus on solving problems. It’s like adding rocket fuel to your workflow.
Common Pitfalls and How to Dodge Them
Setting up Email to Case Salesforce can feel like a breeze until you hit a snag that slows everything down. Email addresses that have not been verified may give bounced messages without cases being created and customers feeling frustrated. Oversized attachments or poor routing rules might clog your queues or truncate key details. A quick setup check and some clever tweaks can keep your system running smoothly.
Nobody wants their support team stuck firefighting preventable issues. Forgetting to test forwarding setups can lead to missed emails while weak queue rules pile cases onto one poor soul. Overlooking such metrics as unassigned cases may conceal the problems until they get out of control. Be innovative with quick solutions which will save you time and keep your customers satisfied.
- Verify email forwarding: Check routing addresses to prevent SPF or DKIM problems.
- Watch attachment limits: Cap files at 25MB to prevent truncated cases or errors.
- Balance queue loads: Spread cases evenly with rules to avoid overwhelming one team.
- Check unassigned cases: Use dashboards to spot and fix cases that slip through cracks.
- Test reply threading: Ensure Case Thread ID is included to keep replies linked properly.
- Audit email filters: This will filter out the spam or non-customer mail to clean your CRM.
Conclusion
Email to Case Salesforce is what you need to streamline the support process and make a messy inbox a structured case queue. From quick setup steps to clever routing and auto-replies, it saves your company hours and keeps the customers smiling. You can now avoid pitfalls and increase productivity by 40 percent. Grab our free checklist and start transforming your workflow today.
Ready to take your support game to the next level? Keep tweaking those assignment rules and tracking metrics to stay ahead. Share your biggest email headache in the comments or check our related guides for more tips. Your CRM is about to become your team’s best friend so dive in and make it shine.